How Browser Automation Works: From HTTP Requests to DOM Manipulation
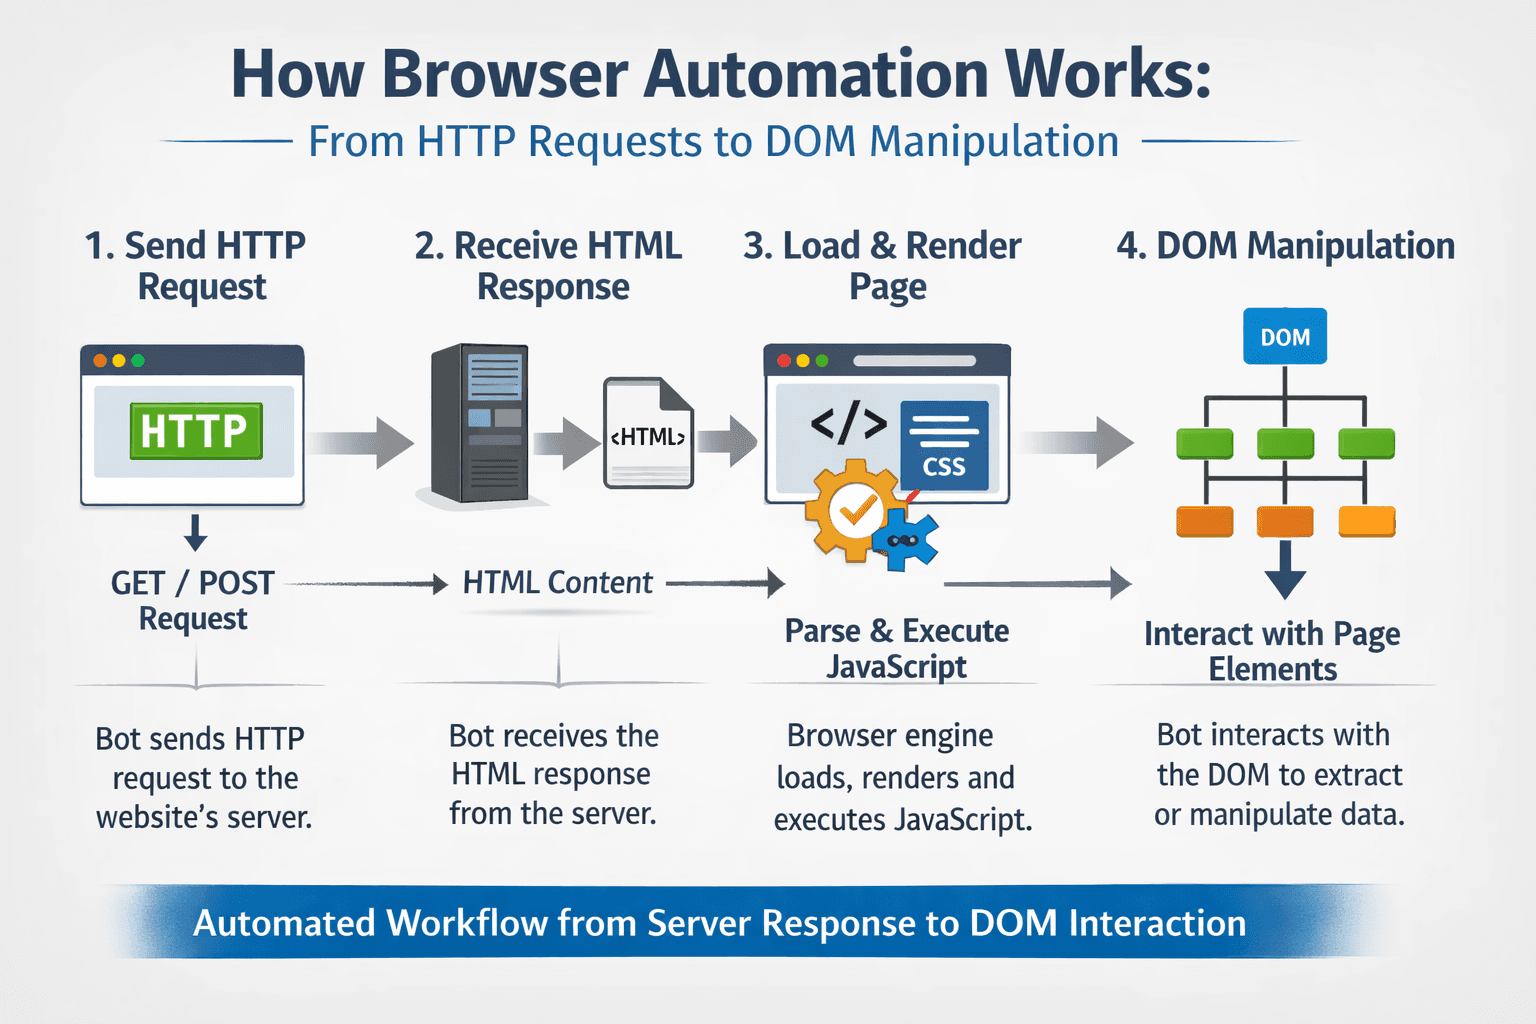
Most people imagine browser automation as a bot clicking buttons very quickly.
In reality, what is happening underneath is much deeper and much closer to how browsers themselves work.
Automation tools do not simply simulate clicks.
They interact with network requests, rendering engines, JavaScript execution, and the DOM.
If browser automation ever feels unpredictable by working on one site but failing on another, the issue is usually not the tool itself.
It is usually a misunderstanding of the layers underneath.
For this guide, I’ll occasionally refer to Appilot because the same principles around state transitions, event-driven automation, and stable execution apply across both browser and mobile automation. While Appilot focuses on Android automation rather than browser automation, the underlying idea is still the same: reliable automation depends on synchronising with the application state rather than simply clicking through steps.
This guide explains how browser automation works from raw HTTP requests to DOM manipulation and why each layer matters.
Understanding Browser Automation
Browser automation is the programmatic control of a real web browser to perform actions that a human user would normally perform.
These actions include navigating pages, filling forms, clicking elements, and extracting data.
Under the hood, automation tools connect to the browser at multiple levels, including network communication, page rendering, DOM inspection, and event handling.
The browser itself is still a real browser.
It executes JavaScript, enforces security rules, loads assets, and maintains state.
Automation simply drives those browser capabilities programmatically.
At its core, browser automation is about controlling state transitions rather than just simulating clicks.
The Core Principle Behind Browser Automation
Browsers are deterministic systems.
When a request is sent, a response returns.
When HTML loads, a DOM is built.
When JavaScript runs, page state changes.
Automation works by synchronising with these transitions.
When a selector appears or a request completes, automation performs the next action.
This is why good automation is event-driven rather than time-driven.
Browser Automation vs Raw HTTP Scripts
A common question is why someone should not simply send HTTP requests directly.
HTTP scripting sends requests directly to a server and skips the browser entirely.
Browser automation, on the other hand, runs a full browser engine that handles JavaScript, cookies, local storage, and rendering.
A useful way to think about it is that HTTP scripts are like sending a letter to a building, while browser automation is actually walking inside and interacting with everything.
Why Browser Automation Is Layered
Understanding the different layers explains both the power and fragility of automation.
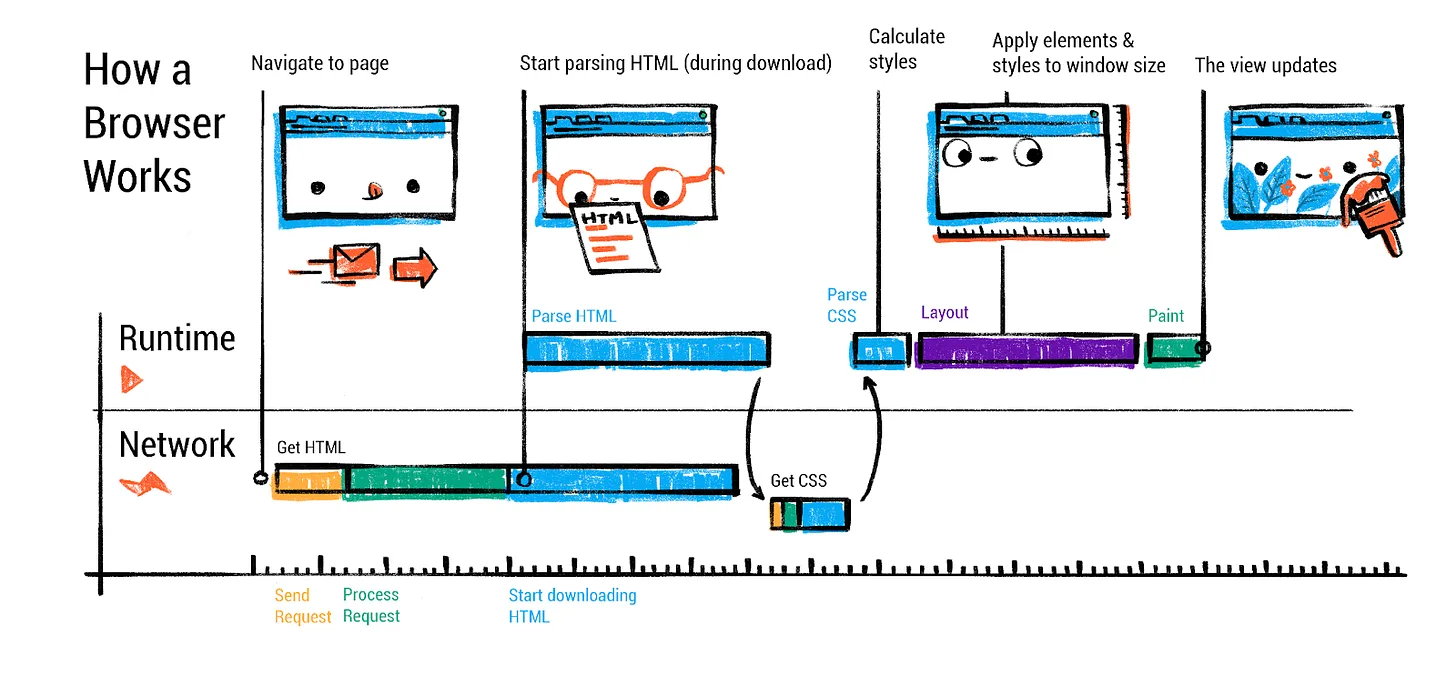
Browser automation operates across three main layers.
Layer 1 – Network-Level Behaviour
Every page load begins with HTTP requests for HTML documents, JavaScript files, APIs, CSS, and other assets.
Automation tools can wait for specific requests, inspect response codes, and intercept or modify traffic.
Many failures happen when automation assumes responses arrive instantly.
Network timing matters.
Layer 2 – Rendering and JavaScript Execution
After responses arrive, HTML is parsed, the DOM is constructed, CSS is applied, and JavaScript executes.
Modern sites are heavily driven by JavaScript.
Content often appears after the initial page load.
Automation needs to wait for real state changes rather than assuming that “page loaded” means “page ready.”
Layer 3 – DOM State and Interaction
Visible elements exist inside the DOM.
Buttons, forms, and text nodes are created, modified, and removed dynamically.
Automation interacts directly with this structure.
DOM-based targeting is far more reliable than visual guessing.
How Browser Automation Works Step by Step
Browser automation follows a predictable lifecycle.
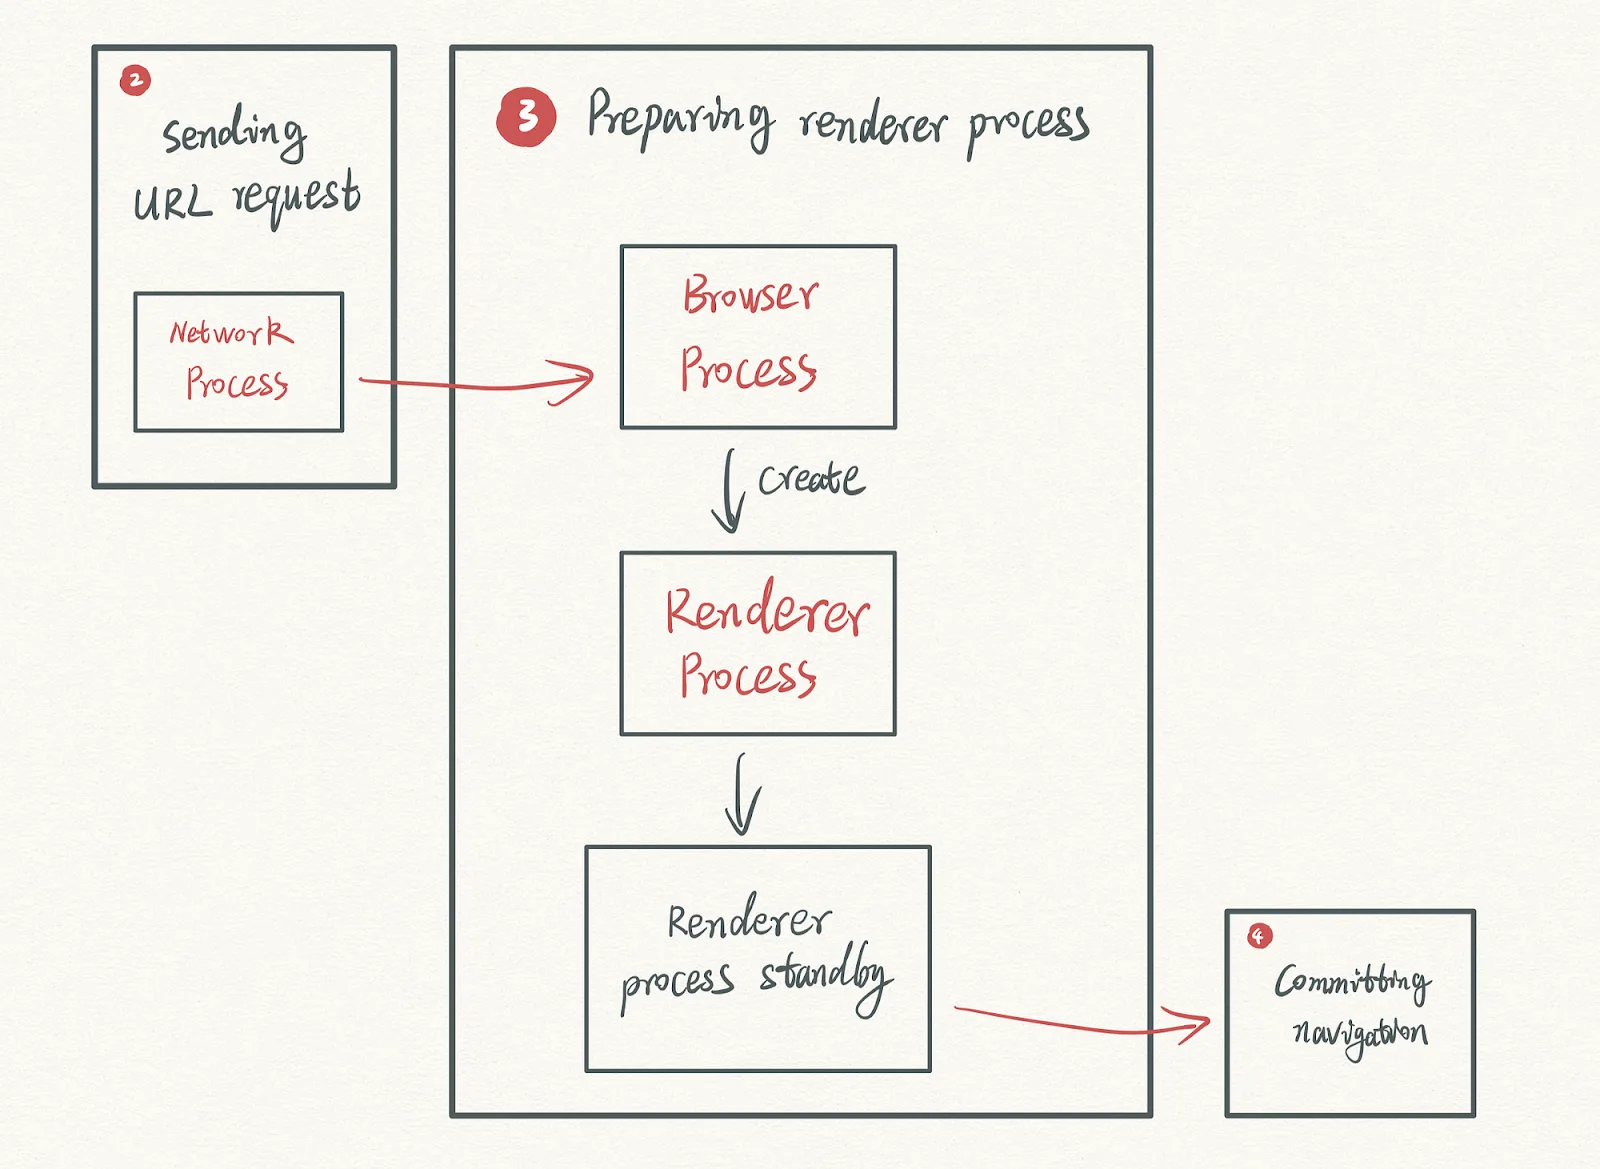
Stage 1 – HTTP Requests & Responses
Automation navigates to a URL.
The browser then sends requests for HTML, scripts, APIs, and assets.
Automation can wait for API completion, validate response status, and synchronise based on network idle states.
Waiting for an important API call is often more reliable than waiting for a visible element.
Stage 2 – DOM Construction
The browser builds the Document Object Model, also known as the DOM.
This defines the element hierarchy, attributes, and event bindings.
Automation queries this structure to locate elements.
Selectors target the DOM rather than pixels.
Stage 3 – JavaScript Execution & State Changes
JavaScript modifies the DOM after the page loads.
It can insert dynamic content, hide or show elements, trigger navigation, and fetch additional data.
Automation must wait explicitly for these changes.
This is why waitForSelector logic exists.
It synchronises automation with the real page state.
Stage 4 – DOM Manipulation & Events
Once the elements exist, automation performs actions such as clicks, typing, form submissions, and scrolling.
These actions dispatch real browser events.
The site responds exactly as if a real person interacted with it.
Why Browser Automation Randomly Fails
Most failures happen because these layers are misunderstood.
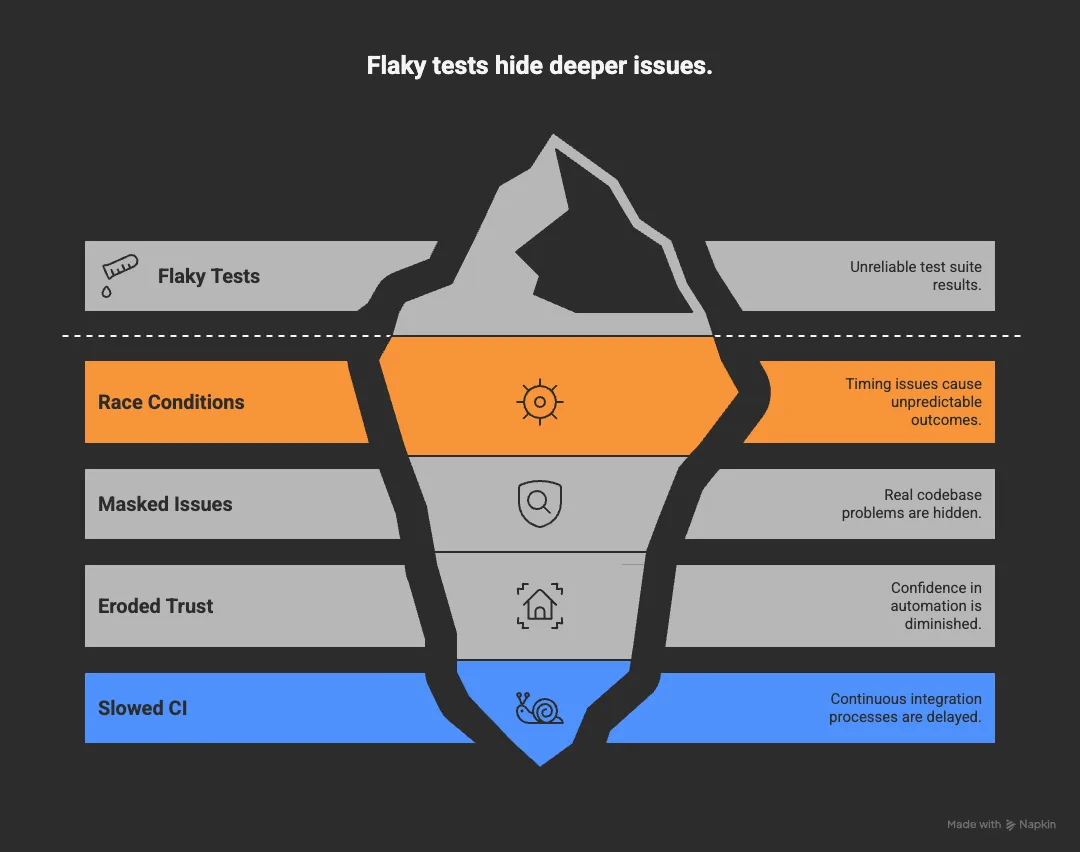
Failure Pattern 1 – Fixed Delays
Using fixed delays such as sleep(5 seconds) instead of waiting for real state changes creates fragile automation.
Networks fluctuate and JavaScript timing changes.
Fixed delays eventually fail.
Failure Pattern 2 – Brittle Selectors
Targeting fragile DOM structures such as deep CSS hierarchies makes automation unstable.
More reliable selectors use semantic attributes, stable IDs, roles, or data attributes.
Failure Pattern 3 – Ignoring Asynchronous Behaviour
Modern applications load data asynchronously.
If automation assumes that “page loaded” means “content ready,” it will fail.
State-based logic is always more reliable than time-based logic.
This is also why Appilot focuses on event-driven workflows rather than relying on static delays. Real-device automation becomes much more reliable when actions happen only after the correct state appears.
Real-World Examples
Example 1 – Form Submission
Automation waits for JavaScript validation logic, locates the correct fields in the DOM, fills them, submits them, and triggers real client-side events.
HTTP-only scripts would skip that client-side validation entirely.
Example 2 – Scraping Dynamic Content
Modern sites often load content through APIs.
Automation can wait for those API calls, extract the fully rendered DOM content, and avoid scraping incomplete HTML.
Example 3 – End-to-End Testing
Testing frameworks use browser automation to validate login flows, checkout processes, and state transitions.
These tests succeed because they respect network, rendering, and DOM layers together.
The Technical Side
Browser Control Protocols
Automation tools communicate with browsers through control protocols that expose navigation, DOM inspection, event dispatch, and network monitoring.
This provides deep visibility into browser state without modifying the website itself.
DOM Selectors and Querying
Selectors are foundational to browser automation.
Strong selectors use semantic attributes, text content, roles, and structural context.
Weak selectors rely on visual structure or positional indexes.
That difference often determines long-term stability.
When Browser Automation Is the Right Tool
Scenario 1 – Heavy JavaScript Apps
Single-page applications rely heavily on client-side rendering.
Scenario 2 – Full User Flow Testing
Browser automation is ideal when validating complete user journeys from beginning to end.
Scenario 3 – Client-Side Logic Is Critical
Automation becomes necessary when APIs alone cannot replicate the workflow.
If an official API exists and supports the workflow properly, it is usually the better option.
If real browser behaviour is required, browser automation becomes necessary.
Tools That Help With Browser Automation
There are several tools commonly used for browser automation.
Playwright is useful because it provides strong support for browser events, network waiting, and modern JavaScript applications.
Puppeteer is useful for deep Chromium-based automation.
Selenium remains valuable when broad browser compatibility is important.
Appilot is useful for Android automation because it handles dynamic app states, real-device execution, and event-driven workflows.
The best option depends on whether the focus is browser automation, mobile automation, or both.
Key Takeaways
Browser automation works because it respects how browsers function.
Automation drives real browsers rather than just sending requests, network rendering and DOM layers all matter, and event-driven logic is far more reliable than fixed delays.
Understanding state transitions prevents flaky behaviour.
Reliable automation is not really about speed.
It is about synchronising with real browser state.
If you are running mobile automation at scale, Appilot can help by reacting to real device states and dynamic application flows rather than relying on static assumptions.
Frequently Asked Questions
Q: How is browser automation different from sending HTTP requests?
Browser automation runs a full browser engine that executes JavaScript and manages client-side state.
Q: Why must automation wait for selectors?
Because elements often appear only after asynchronous JavaScript execution.
Q: Is DOM manipulation detectable?
Websites can infer automation through behavioural signals, but DOM interaction itself mirrors real user behaviour.
Q: When does browser automation fail most often?
It usually fails when scripts rely on fixed delays, fragile selectors, or ignore asynchronous state changes.
Q: Should I use APIs instead?
Use APIs when they are officially supported. Use browser automation when the workflow depends on client-side logic.