How to Build IF-THEN-ELSE Logic into Browser Automation
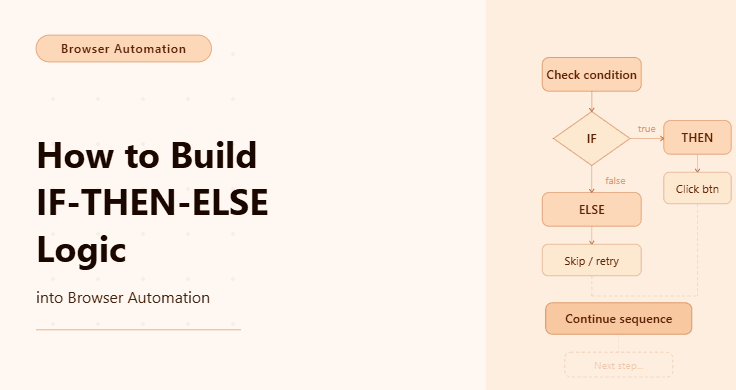
By the end of this tutorial, you will have a browser automation workflow that can make decisions while it runs instead of simply following one fixed path from start to finish. That means your automation will be able to react to what it sees on the page, choose one action when a condition is true, choose another when it is false, and continue running in a way that feels far more practical for real-world tasks like logging in, scraping data, handling missing elements, or responding to page state changes.
To follow along, you will need Python 3.9 or higher, Playwright installed, and a basic understanding of how browser automation scripts are executed from the terminal. You do not need to be an advanced developer, but you should be comfortable reading simple functions, changing selectors, and running Python files.
This setup usually takes around one to two hours to build and test for the first time, and once it works, it becomes the kind of reusable logic you can drop into many other automation workflows. For this tutorial, the automation will run locally, but when you later need to manage multiple browser workflows, accounts, or schedules, a platform like Appilot can become useful as the execution layer because it helps you run the same logic at scale without changing the core decision-making structure you build here.
You will build a browser automation script that opens a page, checks what is present, decides which branch to follow, and then takes the correct next step based on IF-THEN-ELSE conditions rather than blindly clicking through a fixed sequence.
What This Tutorial Builds — And Why This Approach
This tutorial builds a browser automation workflow that can inspect page state before acting, which is one of the biggest differences between a fragile script and a reliable one. A basic script assumes the page will always look the same, the same buttons will always exist, and the same sequence will always work, but real websites do not behave that way. Sometimes a user is already logged in, sometimes a modal appears, sometimes an element is missing, and sometimes a page loads a different layout based on account state or location.
That is exactly why IF-THEN-ELSE logic matters in browser automation. It allows the script to make decisions the same way a human would. If a login form appears, then log in. If the dashboard is already visible, then skip login. Else, if an error banner appears, then stop and capture a screenshot. This kind of branching makes automation more resilient, easier to debug, and much more suitable for real-world use.
Playwright is a good fit for this because it gives you precise control over browser sessions, selectors, timing, and page evaluation, which makes it easier to inspect state and branch intelligently. At small scale, this works perfectly as a local script, but if you later need to run many browser workflows across multiple accounts or environments, Appilot can help as the execution layer by handling orchestration, scheduling, and monitoring while your IF-THEN-ELSE logic stays the same.
How the System Works — Architecture Overview
At a high level, the system opens a browser page and checks the current state before deciding what to do next. Instead of assuming the workflow should always click the same buttons in the same order, it evaluates conditions such as whether a selector exists, whether a message is visible, whether content loaded successfully, or whether a login is required. Based on that result, it follows one branch and skips the others.
This means each step in the workflow becomes a decision point rather than a blind action. That structure is what makes browser automation more stable, because the script reacts to real conditions on the page rather than forcing a path that may not match what is actually happening.
Part 1 — Environment Setup
Step 1 — Install Dependencies
The first step is installing Playwright, which will handle browser control and page interaction. This is the foundation of the workflow because all condition checks and decision branches depend on being able to inspect the browser state accurately.
pip install playwright
playwright install chromium
After installation, verify that Playwright is available so you know the environment is ready before writing the automation logic.
playwright --versionStep 2 — Initialize the Project Structure
A clean project layout matters because condition-based automation becomes more complex quickly, especially when you begin separating login checks, action handlers, error paths, and storage logic. Keeping those responsibilities organized early makes the workflow much easier to extend later.
mkdir browser-logic-automation && cd browser-logic-automation
mkdir scripts data logs
touch main.py scripts/browser_flow.py
This structure keeps the main runner separate from the browser logic itself, which makes testing and maintenance much simpler as the project grows.
Part 2 — Building IF-THEN-ELSE Logic into Browser Automation
Step 3 — Define the Decision Rule
Before writing browser code, it helps to think about the logic in plain terms. In browser automation, IF-THEN-ELSE logic usually answers one question at a time. If the page shows state A, then do action A. Else, if the page shows state B, then do action B. Else, take a fallback action such as logging the failure or stopping the script.
A simple Python version of that logic looks like this:
def decide_page_action(page_state: str) -> str:
    if page_state == "login_required":
        return "login"
    elif page_state == "dashboard_ready":
        return "continue"
    else:
        return "error"
This function is simple, but it captures the exact idea that makes browser automation smarter. The script observes the current state and then picks the correct branch rather than forcing the same action every time.
Step 4 — Create the Browser Session
Now we need a browser session that can open a page and inspect its contents. This gives us the environment where our decision logic will operate.
from playwright.async_api import async_playwright
class BrowserFlow:
    def __init__(self, start_url: str):
        self.start_url = start_url
        self.playwright = None
        self.browser = None
        self.context = None
        self.page = None
    async def start(self):
        self.playwright = await async_playwright().start()
        self.browser = await self.playwright.chromium.launch(headless=False)
        self.context = await self.browser.new_context()
        self.page = await self.context.new_page()
        await self.page.goto(self.start_url)
        return self.page
    async def close(self):
        await self.context.close()
        await self.browser.close()
        await self.playwright.stop()
This opens the browser and gives us a page object that we can inspect for selectors, text, or page elements that help determine what the automation should do next.
Step 5 — Detect the Current Page State
This step is where the automation becomes conditional rather than static. We inspect the page to figure out what state it is currently in before choosing an action.
async def detect_page_state(page) -> str:
    if await page.locator("input[type='password']").count() > 0:
        return "login_required"
    elif await page.locator(".dashboard, [data-testid='dashboard']").count() > 0:
        return "dashboard_ready"
    elif await page.locator(".error, .alert-danger").count() > 0:
        return "error_detected"
    return "unknown"
This function checks the page for a password input, a dashboard element, or an error message. Those checks are the conditions that drive the rest of the workflow. In real projects, you can expand this to include modals, banners, success messages, permission prompts, captchas, or anything else your automation may encounter.
Step 6 — Build the IF-THEN-ELSE Branching Logic
Now we combine the detected state with an action. This is the core of the tutorial because it shows exactly how IF-THEN-ELSE logic controls browser behavior.
async def handle_page_state(page, account_email: str, account_password: str):
    state = await detect_page_state(page)
    if state == "login_required":
        await page.fill("input[type='email']", account_email)
        await page.fill("input[type='password']", account_password)
        await page.click("button[type='submit']")
        return "logged_in"
    elif state == "dashboard_ready":
        return "already_logged_in"
    elif state == "error_detected":
        await page.screenshot(path="logs/error_state.png")
        return "stopped_on_error"
    else:
        await page.screenshot(path="logs/unknown_state.png")
        return "unknown_page_state"
This is the moment where the automation stops being fragile and starts becoming useful. If the login form appears, then it logs in. Else, if the dashboard is already there, then it skips login. Else, if an error is visible, then it captures evidence and stops. Else, it treats the page as unknown and records that state for debugging.
Step 7 — Add a Second Decision Layer
Most real browser workflows need more than one condition. After the script gets past login, it usually needs to check the next page and decide again. This is what makes the automation multi-step and realistic.
async def process_dashboard(page):
    if await page.locator("button:has-text('Start')").count() > 0:
        await page.click("button:has-text('Start')")
        return "started_task"
    elif await page.locator("text=No tasks available").count() > 0:
        return "nothing_to_do"
    else:
        await page.screenshot(path="logs/dashboard_unexpected.png")
        return "dashboard_unknown"
This second layer shows how IF-THEN-ELSE logic is not something you add only once. It becomes the structure of the entire automation. At every meaningful step, the script checks the current state and chooses the right branch.
Part 3 — Running the Complete Workflow
Step 8 — Main Orchestration Script
Now we wire everything together so the browser starts, detects the page state, chooses a branch, and then optionally continues into a second decision layer if appropriate.
import asyncio
from scripts.browser_flow import BrowserFlow, handle_page_state, process_dashboard
async def main():
    flow = BrowserFlow("https://example.com/login")
    try:
        page = await flow.start()
        result = await handle_page_state(
            page,
            account_email="user@example.com",
            account_password="supersecretpassword"
        )
        print("First step result:", result)
        if result in ["logged_in", "already_logged_in"]:
            dashboard_result = await process_dashboard(page)
            print("Dashboard step result:", dashboard_result)
    finally:
        await flow.close()
asyncio.run(main())
This script shows the pattern clearly. One decision leads into the next. The browser automation reacts to what it sees instead of assuming every run will behave the same way.
Step 9 — Testing the Logic Safely
When testing IF-THEN-ELSE logic in browser automation, you should not just test the happy path where everything works perfectly. You should also test cases where the login page is skipped, where the dashboard is already loaded, where an error message appears, and where an expected selector is missing. That is the only way to confirm that the branching logic is doing what you intended.
You should also add logging around each condition so you can clearly see which path the automation took during a run. This helps you debug false conditions, wrong selectors, and cases where the site changed but the workflow did not. The most common reason conditional browser automation fails is not that the logic is wrong in theory, but that the condition detection is too weak or too dependent on unstable selectors.
Step 10 — Scaling Execution with Appilot
At this stage, the browser automation logic works locally, and the core value is already there because the script can make decisions at runtime. But once you move beyond a single local workflow and start handling multiple accounts, many repeated runs, scheduled execution, or environment management, execution itself becomes the harder part.
That is where Appilot fits naturally into this kind of setup. You can keep the same IF-THEN-ELSE logic and use Appilot as the layer that handles operational complexity, including execution management, monitoring, and scaling. In other words, the smart part of the automation remains your branching logic, while the platform helps you run that logic more reliably across larger workloads without forcing you to rebuild the decision structure from scratch.
Part 4 — Production Hardening
Step 11 — Common Issues and Fixes
One of the most common issues in conditional browser automation is relying on selectors that are too brittle, which causes the wrong branch to trigger because the script can no longer detect the intended page state correctly. The fix is to prefer stable selectors such as data-testid, semantic labels, or clear page text instead of random classes that change frequently.
Another common issue is checking conditions too early before the page has fully rendered, which can make the script think an element is missing even though it simply has not loaded yet. The fix is to use waits carefully and make sure the page has reached a stable state before evaluating conditions.
A third issue is trying to put too much logic into one giant IF block, which quickly becomes hard to read and maintain. The better pattern is to split detection and action into smaller functions, so one function figures out the state and another handles the response. That separation makes the code easier to test and much easier to update later.
Step 12 — Optimization Strategies
As your browser automation grows, the goal is not just to add more conditions but to structure them in a way that remains understandable. Conditions should be specific, ordered logically, and designed so that more critical states are checked first. For example, an error state may need to be evaluated before a general content state because it is more important to stop safely than to continue processing the page.
It is also worth thinking about how often a condition really needs to be checked. Some checks belong at the start of a workflow, while others belong after each page transition or action. Good conditional logic is not just about writing IF-THEN-ELSE statements. It is about putting those decisions in the right places so the automation stays efficient, stable, and readable.
FAQ
Q1:What is IF-THEN-ELSE logic in browser automation?
It is a decision-making structure where the script checks a page condition and then chooses one action if the condition is true, another action if it is false, and sometimes a third fallback action if neither expected case applies.
Q2: Why is this better than a fixed automation script?
Because real websites do not always behave the same way, and conditional logic allows the script to adapt to login states, missing elements, error messages, and different page layouts instead of breaking immediately.
Q3: Can I use this structure for scraping, posting, or monitoring?
Yes, the same structure works across many browser automation tasks because the main idea is always the same: inspect the page, decide the current state, and then act accordingly.
Q4: Do I need Appilot to build this?
No, you can build and run this locally with Python and Playwright. Appilot becomes useful later when you want to run these workflows across multiple accounts or environments more reliably.
Conclusion
The key difference between a toy browser script and a production-ready browser automation workflow is decision-making. Once you build IF-THEN-ELSE logic into the script, it stops acting like a rigid list of clicks and starts behaving like a system that can respond to real conditions on the page. That is what makes it more stable, more reusable, and far more practical in real use cases.
Start with small condition checks, make each branch explicit, and test every major path instead of only testing the ideal scenario. Once that logic is working, you can keep expanding the workflow step by step, adding more decision points where they actually matter. That is how reliable browser automation is built.