How to Build a Multi-Step Automation Workflow with Conditional Logic
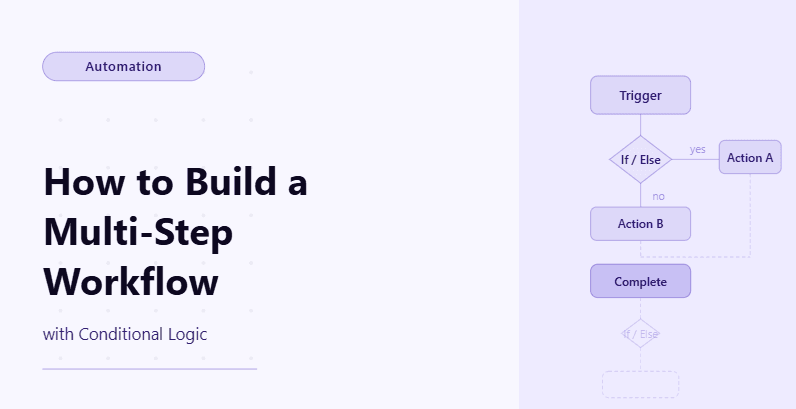
By the end of this tutorial, you will have a fully functional multi-step automation workflow that can evaluate conditions in real time and decide what action to take at each stage without requiring manual input. This is not just a simple script that runs tasks in sequence, but a system that can dynamically branch into different paths depending on the data it processes, making it significantly more powerful and closer to how real-world automation systems operate.
To follow along, you will need Python 3.9 or higher, a basic understanding of how to run scripts from the terminal, and familiarity with browser automation tools such as Playwright, although deep expertise is not required since the structure will be explained step by step. If you are starting from scratch, expect to spend around two to three hours setting everything up and running your first successful workflow, after which ongoing usage will require minimal effort.
For this tutorial, I will show the implementation using a standard Python-based setup, but if you are managing multiple workflows or accounts at scale, platforms like Appilot can be used later to handle execution, scheduling, and monitoring without requiring you to build additional infrastructure yourself. The logic we build here will remain the same regardless of the execution layer you choose.
You will be building a system that processes input data, evaluates conditions, and executes different actions based on those conditions, allowing you to automate tasks such as scraping, posting, monitoring, or triggering alerts in a structured and scalable way.
What This Tutorial Builds — And Why This Approach
This tutorial builds a multi-step automation workflow that processes tasks in sequence while evaluating conditions at each step so that the system can decide whether to continue, branch into another action, retry a failed step, or stop execution entirely based on the outcome of previous steps. This approach reflects how real automation systems operate in production environments where static, linear scripts are often insufficient.
The workflow is designed in a modular way so that each step is isolated and reusable, which allows you to modify individual parts of the system without breaking the entire pipeline. Playwright is used for browser-level control because it provides precise interaction capabilities and supports asynchronous execution, which becomes important as workflows grow in complexity.
At smaller scale, running this workflow locally is sufficient, but as the number of tasks or accounts increases, execution management becomes the main bottleneck. This is where an execution layer such as Appilot becomes relevant, since it allows you to run the same workflow across multiple environments while handling scheduling, monitoring, and parallel execution without requiring additional engineering effort.
How the System Works — Architecture Overview
At a high level, the system takes input data and processes it through a sequence of steps where each step includes a condition check that determines what happens next. Instead of executing the same action for every input, the workflow evaluates the data and chooses different paths, which makes it adaptive and significantly more efficient in handling real-world scenarios where inputs vary.
Each step in the workflow acts as a decision node, meaning that the output of one step influences the next action, and this chain continues until the workflow completes or stops due to a condition such as detection, failure, or completion of all tasks. This structure allows the system to handle edge cases gracefully instead of failing entirely when something unexpected occurs.
Part 1 — Environment Setup
Step 1 — Install Dependencies
The first step is to install the required dependencies, which include Playwright for browser automation and any supporting Python libraries needed for handling data and execution flow. These dependencies form the foundation of the workflow and enable interaction with external platforms as well as internal logic processing.
pip install playwright
playwright install chromium
After installation, you should verify that everything is working correctly by checking the installed version, which ensures that your environment is ready before moving on to building the workflow logic.
playwright --version
Step 2 — Initialize Project Structure
A clean project structure is important because multi-step workflows quickly become complex, and organizing files properly makes it easier to maintain and scale the system later. You should separate configuration, workflow logic, data storage, and execution scripts so that each component has a clear responsibility.
mkdir automation-workflow && cd automation-workflow
mkdir scripts data logs
touch main.py scripts/workflow.py scripts/storage.py
This structure ensures that your workflow remains modular and that future enhancements can be implemented without restructuring the entire project.
Part 2 — Building the Core Automation
Step 3 — Defining Conditional Logic
The core difference between a simple automation script and a scalable workflow lies in conditional logic, which allows the system to make decisions instead of executing fixed instructions. This is where the workflow becomes intelligent, as it evaluates input data and determines the appropriate action dynamically.
def evaluate_condition(data):
    if data["value"] > 100:
        return "high"
    elif data["value"] > 50:
        return "medium"
    else:
        return "low"
This function acts as a decision engine that categorizes inputs and enables branching logic in later steps.
Step 4 — Building the Workflow Executor
The workflow executor is responsible for orchestrating the entire process by iterating over input items, evaluating conditions, and executing the appropriate action for each case. This component ties together the logic and ensures that the workflow operates as a cohesive system.
class WorkflowExecutor:

    def __init__(self):

        self.results = {"success": [], "failed": []}


    async def run(self, items):
        for item in items:
            try:
                decision = evaluate_condition(item)
                if decision == "high":
                    result = await self.process_high(item)
                elif decision == "medium":
                    result = await self.process_medium(item)
                else:
                    result = await self.process_low(item)
                self.results["success"].append(result)
            except Exception as e:
                self.results["failed"].append({
                    "item": item,
                    "error": str(e)
                })
        return self.results
This structure ensures that each item is processed independently while still allowing the workflow to adapt based on conditions.
Step 5 — Implementing Action Handlers
Each branch of the workflow must define its own action so that different types of inputs are handled appropriately. These actions can represent anything from data extraction to posting content or triggering alerts, depending on the use case.
async def process_high(self, item):
    print(f"Processing HIGH priority: {item}")
    return {"status": "high_processed", "item": item}
async def process_medium(self, item):
    print(f"Processing MEDIUM priority: {item}")
    return {"status": "medium_processed", "item": item}
async def process_low(self, item):
    print(f"Processing LOW priority: {item}")
    return {"status": "low_processed", "item": item}
These functions illustrate how the workflow branches into different execution paths based on evaluated conditions.
Step 6 — Adding Retry Logic
In real-world automation, failures are inevitable, and retry logic ensures that temporary issues do not break the entire workflow. By implementing controlled retries, the system becomes more resilient and capable of handling transient errors.
async def retry_action(func, item, retries=3):
    for attempt in range(retries):
        try:
            return await func(item)
        except Exception:
            if attempt == retries - 1:
                raise
This approach allows the workflow to recover from temporary failures while still preventing infinite loops.
Step 7 — Storing Results
Storing results is essential for tracking what the workflow has processed, identifying failures, and enabling future analysis. Without proper storage, it becomes difficult to debug issues or measure performance.
import json
def save_results(results):
    with open("data/results.json", "w") as f:
        json.dump(results, f, indent=2)
This ensures that every run produces a structured output that can be reviewed or used in subsequent workflows.
Part 3 — Running the Workflow
Step 8 — Main Execution Script
The main script connects all components of the system and executes the workflow from start to finish. This is where input data is passed into the executor and results are processed and stored.
import asyncio
from scripts.workflow import WorkflowExecutor
items = [
    {"id": 1, "value": 120},
    {"id": 2, "value": 70},
    {"id": 3, "value": 30}
]
async def main():
    executor = WorkflowExecutor()
    results = await executor.run(items)
    save_results(results)
asyncio.run(main())
Running this script processes each item based on its value and applies the corresponding logic defined earlier.
Step 9 — Scaling Execution with Appilot
At this stage, the workflow runs correctly in a local environment, but as the number of workflows or accounts increases, managing execution manually becomes inefficient and difficult to maintain. Running multiple workflows sequentially introduces delays, while parallel execution requires additional infrastructure and monitoring.
This is where Appilot becomes relevant as an execution layer rather than a replacement for your logic. Instead of rewriting your workflow, you can run the same logic in a managed environment where scheduling, monitoring, and multi-account execution are handled automatically. This allows you to focus on improving the workflow logic itself while the platform handles operational complexity.
Part 4 — Production Hardening
Step 10 — Common Issues and Fixes
One of the most common issues in conditional workflows is incorrect branching logic, which leads to unexpected behavior where items are processed in the wrong category or skipped entirely, and this can be mitigated by logging condition outputs before executing actions so that decision paths are visible during debugging.
Another issue arises when retry mechanisms are implemented without limits, which can cause infinite loops and stall the workflow indefinitely, so it is important to always define a maximum number of retries and ensure that failures are properly recorded instead of endlessly retried.
Inconsistent results can also occur when input data is not validated, which highlights the importance of preprocessing inputs before they enter the workflow to ensure that conditions are evaluated correctly and consistently.
Step 11 — Optimization Strategies
As workflows grow, performance becomes a critical factor, and optimizing execution involves reducing unnecessary delays, using asynchronous processing effectively, and ensuring that decision logic is efficient and not overly complex. It is also important to log key decision points so that performance bottlenecks can be identified and addressed without guessing where issues originate.
FAQ
Q1: What is conditional logic in automation?
Conditional logic allows a workflow to make decisions based on input data instead of following a fixed sequence of steps.
Q2: Can this workflow be used for different use cases?
Yes, the same structure can be applied to scraping, posting, monitoring, or any task that requires decision-based execution.
Q3: Do I need Appilot to run this workflow?
No, the workflow can run locally, but Appilot becomes useful when scaling execution across multiple workflows or accounts.
Conclusion
You now have a complete multi-step automation workflow that can evaluate conditions and dynamically decide what actions to take based on real-time data, which is a fundamental shift from simple scripts that execute fixed sequences without adaptation.
The most important takeaway is that scalable automation is not about executing more tasks, but about making better decisions within those tasks, and conditional logic is what enables that shift. Once your logic is solid, scaling becomes a matter of execution rather than design.
Start by building simple workflows, gradually introduce conditions, and test each branch thoroughly before expanding. As complexity increases, consider moving execution to a managed environment so that operational challenges do not limit your ability to scale.