How to Chain Multiple Browser Tasks into a Single Automated Sequence
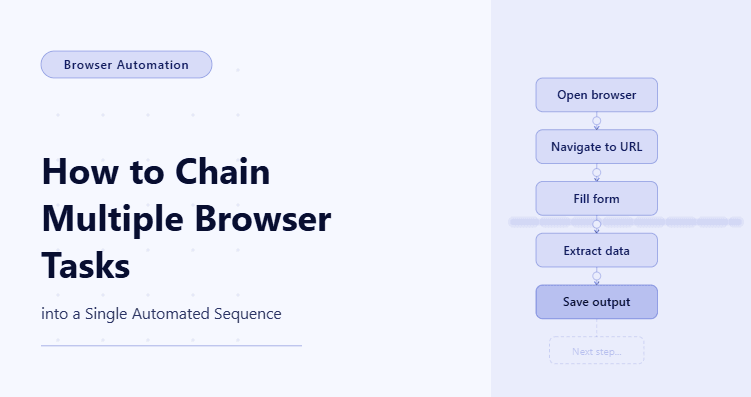
By the end of this tutorial, you will have a working browser automation sequence that connects multiple tasks into one continuous flow so that each action naturally leads into the next without requiring manual intervention between steps. Instead of running isolated scripts for login, navigation, form handling, scraping, or data capture, you will build a single structured process that moves through all of those actions in the correct order and handles them as one cohesive automation system.
To follow along, you will need Python 3.9 or higher, Playwright installed on your machine, and a basic understanding of how browser automation works at a practical level. You do not need to be an expert, but you should be comfortable running Python files from the terminal and reading simple automation logic. The initial setup usually takes between one and two hours, and once the system is built, ongoing maintenance tends to be minimal unless the target site changes its interface or flow.
For this tutorial, I will show the implementation using a straightforward Python and Playwright setup because it gives you direct control over browser state, page interactions, and task sequencing. If you later want to run this kind of browser workflow across multiple accounts, schedules, or environments, an execution layer like Appilot can help manage those runs more efficiently without forcing you to redesign the underlying logic.
What you are building is a multi-step browser automation workflow that opens a session, moves through a series of connected tasks, evaluates what happened after each one, and decides whether to continue, retry, skip, or stop. That makes the sequence more reliable than a simple one-off script and much closer to how real browser automation systems are designed in production.
What This Tutorial Builds — And Why This Approach
This tutorial builds a single automated browser sequence that chains together multiple tasks inside the same session so that the workflow can preserve context from one step to the next rather than restarting from scratch every time. That matters because most real browser tasks are not independent. A login action affects navigation. A navigation action affects what data is available. A form submission affects what confirmation page appears next. When you connect those tasks properly, the automation becomes faster, cleaner, and much easier to manage.
The reason this approach works so well is that it treats browser automation as a workflow instead of a collection of disconnected commands. Rather than writing separate scripts for each action, you create one orchestrated flow where every step has a clear purpose and every output feeds the next step. This makes the system more predictable and easier to debug because you can see exactly where the sequence succeeds, where it branches, and where it fails.
For smaller use cases, running this sequence locally is perfectly fine. But if you are running the same browser workflow repeatedly across many accounts or use cases, then scheduling, monitoring, and execution management start becoming the real challenge. That is where Appilot fits naturally, because it can sit on top of the workflow you build here and handle the operational side of running it at scale.
How the System Works — Architecture Overview
At a high level, the system starts a browser session, performs authentication if needed, moves to the correct page, executes a primary action, checks the result of that action, then continues into the next browser task using the same live context. This is important because it allows the workflow to behave like a real user journey rather than a set of disconnected automated calls.
Each task in the sequence is treated as a step with a defined input, an expected outcome, and a follow-up decision. If the step succeeds, the workflow proceeds. If the step partially succeeds or returns an unexpected state, the workflow can retry, branch into another path, or stop cleanly. That structure makes chained browser automation much more resilient than a rigid script that assumes everything will always work exactly as expected.
Part 1 — Environment Setup
Step 1 — Install Dependencies
The first step is to install the tools that will power the workflow. Playwright gives you the browser control layer, while Python provides the logic that ties tasks together into a single sequence. This combination works especially well for browser automation because it is flexible enough for simple flows and strong enough for complex ones.
pip install playwright
playwright install chromium
After installing the dependencies, verify that Playwright is available in your environment before moving on. This saves time later and confirms that your browser binaries are installed correctly.
playwright --versionStep 2 — Create the Project Structure
A clean project structure matters because chained browser workflows usually grow quickly. Once you start adding session logic, task handlers, validation checks, and result storage, a single file becomes hard to maintain. Splitting the project into focused files keeps the workflow readable and easier to extend later.
mkdir browser-sequence && cd browser-sequence
mkdir scripts data logs
touch main.py scripts/session.py scripts/tasks.py scripts/storage.py
This gives you a simple layout where session startup, browser tasks, and result handling remain separated instead of getting mixed together in one large script.
Part 2 — Building the Core Sequence
Step 3 — Start a Reusable Browser Session
The workflow needs one browser session that stays alive across all tasks in the sequence. This is what allows you to log in once, preserve cookies and session state, and continue through multiple steps without reopening the browser for every action. That continuity is one of the biggest advantages of chaining browser tasks into a single automated sequence.
from playwright.async_api import async_playwright
class BrowserSession:
    def __init__(self):
        self.playwright = None
        self.browser = None
        self.context = None
        self.page = None
    async def start(self):
        self.playwright = await async_playwright().start()
        self.browser = await self.playwright.chromium.launch(headless=False)
        self.context = await self.browser.new_context()
        self.page = await self.context.new_page()
        return self.page
    async def close(self):
        await self.context.close()
        await self.browser.close()
        await self.playwright.stop()
This class creates a persistent session that can be passed from one task to the next, which is exactly what you need when multiple browser actions depend on each other.
Step 4 — Define Each Browser Task as a Separate Function
Even though the workflow runs as one continuous sequence, each task should still be defined separately so that the system stays modular. This makes it easier to reuse individual tasks, test them in isolation, and swap them out later if the browser flow changes.
class BrowserTasks:
    def __init__(self, page):
        self.page = page
    async def login(self, email, password):
        await self.page.goto("https://example.com/login")
        await self.page.fill("input[type='email']", email)
        await self.page.fill("input[type='password']", password)
        await self.page.click("button[type='submit']")
        await self.page.wait_for_load_state("networkidle")
        return {"status": "success", "step": "login"}
    async def navigate_to_dashboard(self):
        await self.page.goto("https://example.com/dashboard")
        await self.page.wait_for_load_state("networkidle")
        return {"status": "success", "step": "dashboard"}
    async def extract_data(self):
        title = await self.page.text_content("h1")
        return {"status": "success", "step": "extract", "title": title}
Each task returns a structured result so the workflow can evaluate what happened and decide what to do next.
Step 5 — Add Logic That Chains the Tasks in Order
This is the point where isolated browser actions become a real sequence. The workflow controller runs one task, checks the result, and then triggers the next task only if the current step completed correctly. This creates a controlled flow instead of a blind script that just fires commands in order.
async def run_sequence(page):
    tasks = BrowserTasks(page)
    login_result = await tasks.login("user@example.com", "password123")
    if login_result["status"] != "success":
        return {"status": "stopped", "failed_step": "login"}
    nav_result = await tasks.navigate_to_dashboard()
    if nav_result["status"] != "success":
        return {"status": "stopped", "failed_step": "dashboard"}
    data_result = await tasks.extract_data()
    if data_result["status"] != "success":
        return {"status": "stopped", "failed_step": "extract"}
    return {
        "status": "success",
        "results": [login_result, nav_result, data_result]
    }
This structure is simple, but it shows the essential idea behind chaining browser tasks. One step completes, its result is checked, and only then does the workflow move forward.
Step 6 — Add Conditional Logic Between Tasks
In real workflows, not every step should lead to the exact same next action. Sometimes a successful login leads to a dashboard. Sometimes it leads to a verification page. Sometimes data extraction returns no results and should trigger a different path. That is why conditional logic matters in browser task sequences.
async def run_sequence(page):
    tasks = BrowserTasks(page)
    login_result = await tasks.login("user@example.com", "password123")
    if login_result["status"] != "success":
        return {"status": "stopped", "failed_step": "login"}
    current_url = page.url
    if "verify" in current_url:
        return {"status": "stopped", "failed_step": "verification_required"}
    nav_result = await tasks.navigate_to_dashboard()
    if nav_result["status"] != "success":
        return {"status": "stopped", "failed_step": "dashboard"}
    data_result = await tasks.extract_data()
    if not data_result.get("title"):
        return {"status": "stopped", "failed_step": "missing_data"}
    return {
        "status": "success",
        "results": [login_result, nav_result, data_result]
    }
Now the workflow is not just a chain of tasks. It is a decision-based sequence that reacts to browser state and results along the way.
Step 7 — Save the Output of the Sequence
Once the sequence finishes, you need to save the results so that you can review what happened, debug failures, and use the extracted data in later processes. Without structured output, it becomes difficult to know whether the sequence is behaving consistently over time.
import json
from pathlib import Path
def save_results(results):
    Path("data").mkdir(exist_ok=True)
    with open("data/results.json", "w", encoding="utf-8") as f:
        json.dump(results, f, indent=2)
This gives you a persistent record of the automation run and makes it much easier to understand what the sequence actually did.
Part 3 — Running the Complete Workflow
Step 8 — Create the Main Entry Point
The main script ties everything together. It starts the session, runs the sequence, saves the results, and closes the browser cleanly at the end. This is the file you will actually run when testing the full workflow.
import asyncio
from scripts.session import BrowserSession
from scripts.tasks import run_sequence
from scripts.storage import save_results
async def main():
    session = BrowserSession()
    page = await session.start()
    try:
        results = await run_sequence(page)
        save_results(results)
        print(results)
    finally:
        await session.close()
asyncio.run(main())
This makes the full sequence executable from a single command while keeping the underlying logic organized across smaller modules.
Step 9 — Test the Full Sequence
Once the pieces are in place, run the automation and verify the flow step by step. The goal here is not only to see whether the script works, but to confirm that the browser tasks truly behave as one connected sequence and that the workflow stops cleanly when something unexpected happens.
python main.pyWhen you test, pay close attention to whether session state is preserved correctly, whether the navigation path is the one you expect, and whether the saved results accurately reflect what happened in the browser. In chained browser workflows, the biggest issues usually come from assumptions about page state, timing, or element availability, so careful testing is essential.
Step 10 — Scale the Sequence with Appilot
Once your sequence works reliably on a local machine, the next challenge is not usually the browser logic itself but the operational side of running it repeatedly across multiple workflows, accounts, or schedules. This is where many teams start to feel the pain of manual execution, because even a well-built browser sequence becomes hard to manage when it has to run consistently in production.
This is where Appilot becomes useful in a natural way. Instead of replacing the logic you built, it acts as the execution layer around it. You still define the browser flow, the chained tasks, and the conditions that control the sequence, but Appilot helps manage when and where that workflow runs, how execution is monitored, and how multiple runs can be handled without manual overhead. That makes it especially useful once you move beyond a single local script and start thinking in terms of repeatable, scalable browser operations.
Part 4 — Common Problems and Practical Fixes
Step 11 — Prevent Task Sequences from Breaking Mid-Flow
One of the most common problems in chained browser automation is that a later step assumes the earlier step succeeded even when it did not fully complete. For example, a login action may appear successful visually but fail to establish the session state needed for the next page. That is why every task in the sequence should return a structured result and why every result should be checked before continuing.
Another frequent issue is brittle selectors. If the automation depends on CSS classes or unstable page structures, one small front-end change can break the sequence at a specific step. Using more stable selectors and validating page state before performing the next action makes the sequence much more reliable.
Timing problems also appear often in multi-step browser workflows because one task may finish visually while the next task still depends on asynchronous content that has not loaded yet. Waiting for clear signals such as load states, specific elements, or expected URLs is far more dependable than relying on fixed sleep values throughout the sequence.
Step 12 — Make the Sequence Easier to Maintain
As your workflow grows, clarity becomes just as important as functionality. Keeping each browser task in its own function, returning structured step results, and making the main sequence controller easy to read all reduce maintenance time significantly. When a browser flow changes, you want to update one part of the system without having to unravel a giant script full of tightly coupled commands.
It is also worth adding logging around each step so you can see where the sequence begins, which task is currently running, what result it returned, and where failures occur. Good logging turns debugging from guesswork into a straightforward review process, especially when the workflow becomes longer or more dynamic.
FAQS
Q1: Why should I chain multiple browser tasks instead of running separate scripts?
Chaining browser tasks allows you to maintain session continuity, which means actions like login, navigation, and data extraction happen within the same context instead of restarting each time. This makes the workflow faster, more reliable, and closer to how a real user interacts with a website, while also reducing redundant steps like repeated authentication.
Q2: How do I ensure session data is preserved across all steps in the sequence?
You ensure session persistence by using a single browser context throughout the workflow instead of creating a new one for each task. By keeping the same page and context alive, cookies, authentication tokens, and navigation state remain intact, allowing each step to build on the previous one without interruption.
Q3: What is the best way to handle failures in the middle of a browser workflow?
The best approach is to return structured results from each step and validate them before moving forward, so the workflow can stop, retry, or switch to an alternate path instead of continuing blindly. This prevents errors from cascading and makes debugging easier because you know exactly where and why the failure occurred.
Q4: How can I make my browser automation sequence adaptable to different page states?
You can make the sequence adaptable by adding conditional logic that checks page state, URL patterns, or the presence of specific elements before deciding the next step. This allows the workflow to react to variations such as login challenges, missing data, or unexpected redirects instead of failing when the flow changes.
Q5: When should I move from a local setup to a managed execution layer like Appilot?
You should consider moving to a managed execution layer when you need to run workflows across multiple accounts, schedules, or environments consistently. At that point, the challenge shifts from building the automation logic to managing execution, monitoring results, and handling scale, which is where tools like Appilot provide the most value.
Conclusion
Chaining multiple browser tasks into a single automated sequence is what transforms simple browser scripting into a real workflow. Instead of treating login, navigation, scraping, and submission as separate scripts, you connect them into one continuous process where each step depends on the outcome of the last and pushes the automation forward in a controlled way.
The most important lesson is that successful browser automation is not just about clicking the right elements. It is about managing flow, preserving session state, validating outcomes, and deciding what to do next when the browser does not behave exactly as expected. Once you build your automation with that mindset, the system becomes much more resilient and far easier to scale.
Start with a short sequence, make every step explicit, and test the full journey carefully before adding more complexity. Once the workflow is stable, you can extend it with retries, alternate paths, data storage, and a managed execution layer for larger-scale operation. That is how isolated browser tasks become a reliable automated system.