How to Log Automation Errors for Debugging and Analysis
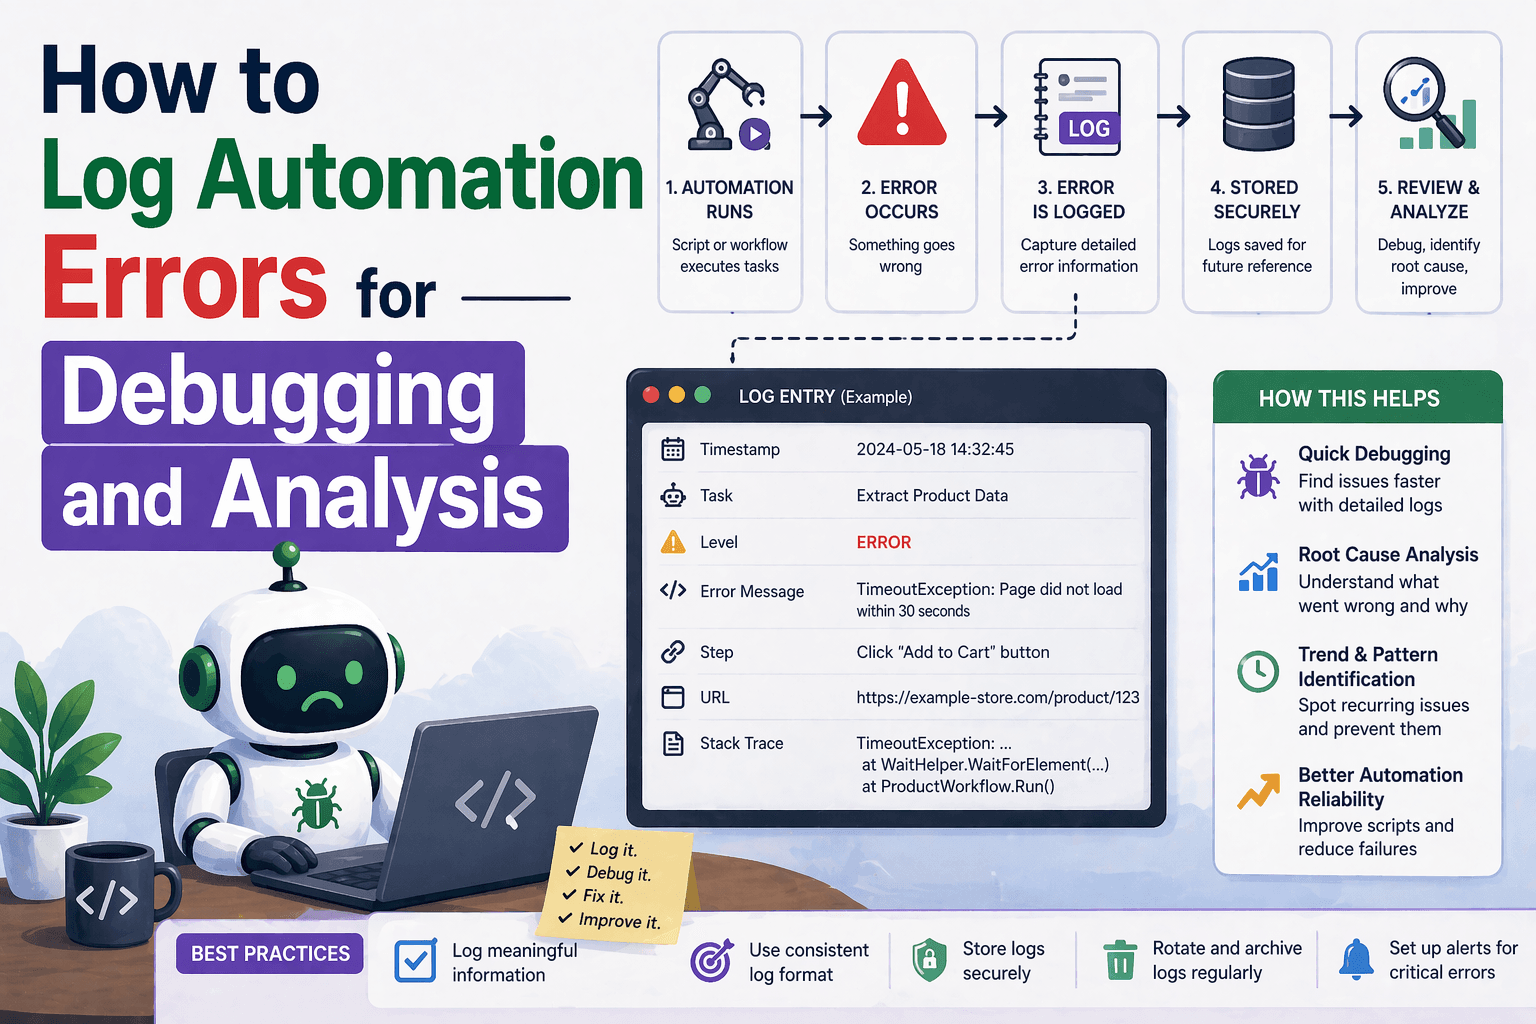
By the end of this tutorial, you will understand how to design logging systems that capture meaningful error information instead of leaving you guessing when automation fails. Logging is one of the most overlooked parts of automation, yet it is the difference between quickly fixing an issue and spending hours trying to reproduce it.
To follow along, you only need a basic understanding of how your automation workflows run. Whether you are working with browser automation, data pipelines, or scheduled tasks, the principles of logging remain the same. The focus here is not on writing code, but on structuring logs so they provide clear, actionable insights.
This setup typically takes less than an hour to add to an existing workflow, but it pays off every time something breaks. If you later manage multiple workflows across environments, Appilot can help centralize execution while your logging system ensures every failure is traceable.
You will build a system that captures errors, records context, organizes logs, and makes debugging faster and more reliable.
What This Tutorial Builds — And Why This Approach
This tutorial builds a structured logging layer that records not just errors, but the context around them. Instead of simple messages like “task failed,” the system captures details such as what step failed, what input was used, what the system expected, and what actually happened.
This approach is important because most automation failures are hard to debug without context. A missing element, a failed request, or an incorrect value may all look similar at a high level, but require completely different fixes. Good logging makes these differences visible.
At a small scale, logs can be stored locally in files. At a larger scale, where multiple workflows run continuously, Appilot becomes useful because it helps centralize execution while your logging system provides detailed insights into each run.
How the System Works — Architecture Overview
At a high level, the workflow records information at each important step. When an error occurs, the system logs the failure along with relevant context such as timestamps, task names, input values, and error messages. These logs are stored in a structured format so they can be reviewed later.
This structure separates execution from observation. The workflow performs tasks, while the logging layer records what happens. This separation ensures that logging does not interfere with execution while still providing full visibility.
Part 1 — Understanding What to Log
Step 1 — Capture Key Events
A good logging system records important events such as task start, task completion, and task failure. This creates a timeline that shows how the workflow progressed and where it stopped.
Without this timeline, it is difficult to understand whether a failure happened early or late in the process.
Step 2 — Log Errors with Context
When an error occurs, logging only the error message is not enough. You should also record what the system was trying to do, what input was used, and what the expected result was.
This context turns logs into useful debugging tools instead of vague messages.
Part 2 — Structuring Logs for Clarity
Step 3 — Use Consistent Log Formats
Logs should follow a consistent structure so they are easy to read and analyze. A typical log entry includes a timestamp, a log level, a message, and additional details.
Consistency makes it easier to scan logs quickly and identify patterns.
Step 4 — Separate Log Levels
Not all log messages are equally important. Using different levels such as informational messages, warnings, and errors helps prioritize attention.
This prevents important errors from being lost among routine messages.
Part 3 — Capturing Useful Debugging Information
Step 5 — Record Input and Output Data
When a task fails, knowing the input and output values can help identify the cause. For example, if a scraped value is empty or malformed, logging that value makes the issue immediately visible.
This is especially useful in data pipelines and extraction workflows.
Step 6 — Capture Environment Details
Sometimes failures are caused by environmental factors such as timeouts, network issues, or system configuration. Logging details such as URLs, page states, or timestamps can help identify these issues.
This adds another layer of visibility beyond the immediate error.
Part 4 — Organizing and Storing Logs
Step 7 — Store Logs in Files
For most workflows, storing logs in files is sufficient. Logs can be saved per run or per day, depending on how often the workflow executes.
Organized storage makes it easier to locate and review logs later.
Step 8 — Keep Logs Structured
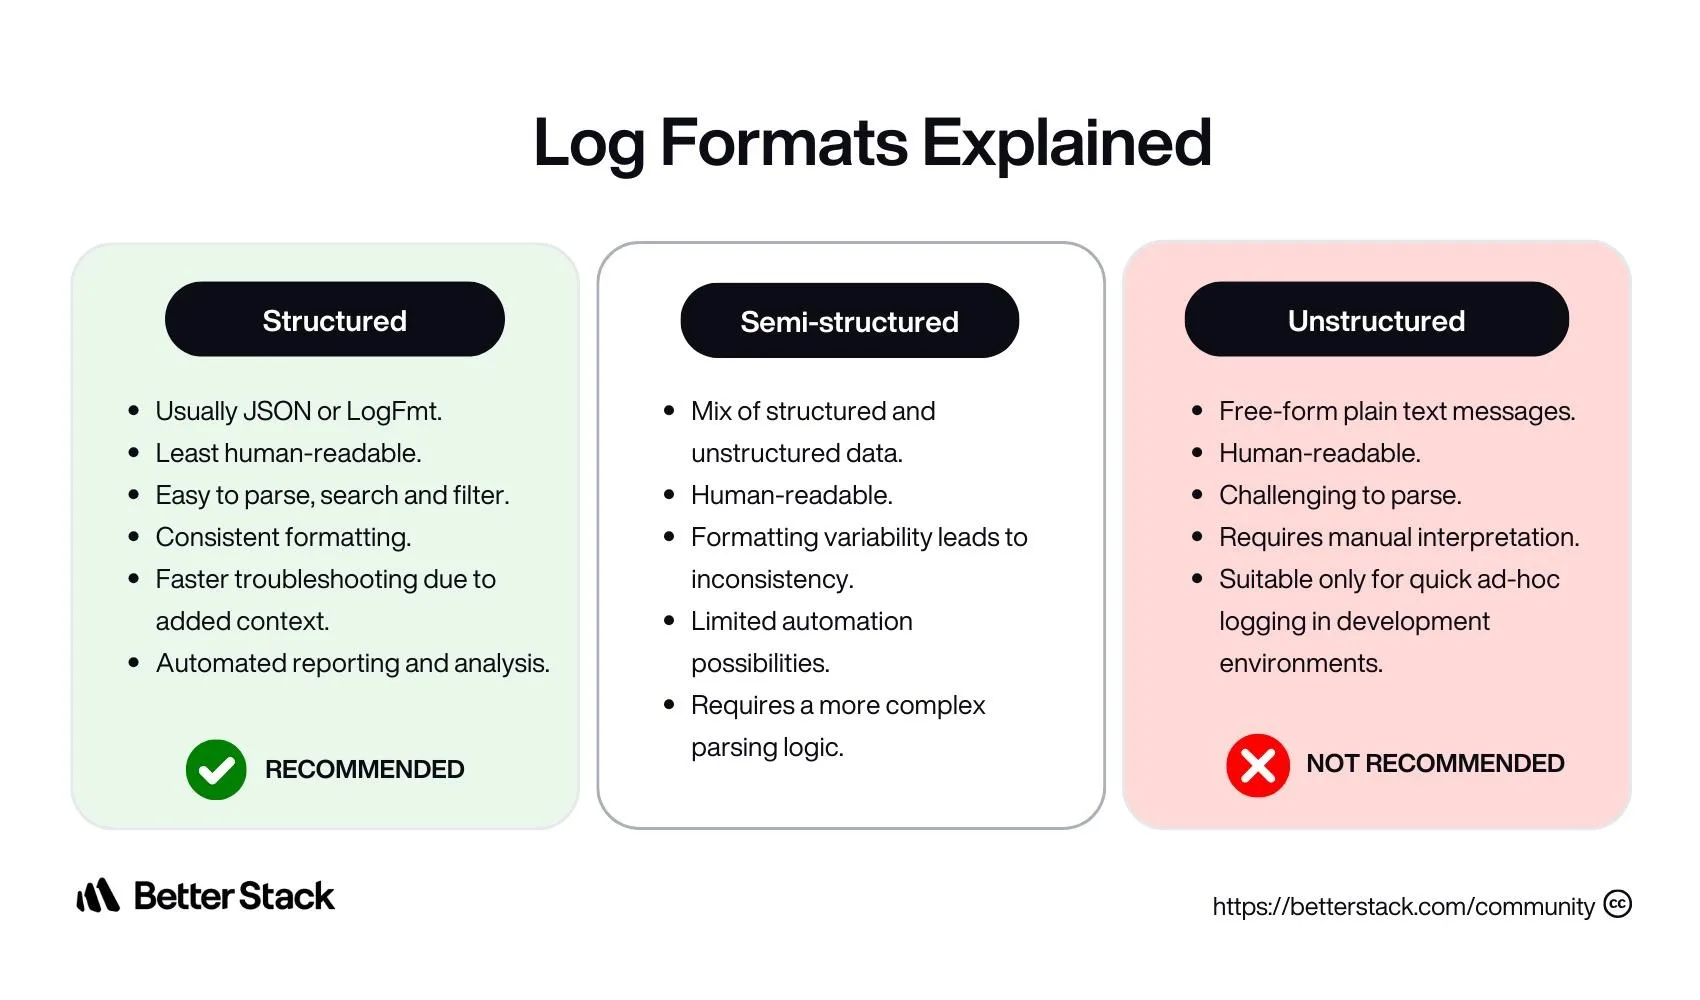
Structured logs, such as JSON-like formats, are easier to analyze than plain text. They allow you to search, filter, and process logs programmatically if needed.
This becomes especially useful as the volume of logs grows.
Part 5 — Using Logs for Analysis
Step 9 — Identify Patterns in Failures
Over time, logs reveal patterns such as repeated failures at the same step or consistent issues with certain inputs. These patterns help prioritize fixes and improve the workflow.
Step 10 — Improve Workflow Based on Logs
Logs are not just for debugging. They are also a tool for improving automation. By analyzing logs, you can refine retry logic, adjust timeouts, or update selectors to make the workflow more reliable.
Part 6 — Real-World Considerations
Step 11 — Avoid Logging Too Little or Too Much
Logging too little makes debugging difficult, while logging too much creates noise. The goal is to log enough information to understand failures without overwhelming the system with unnecessary data.
Step 12 — Protect Sensitive Data
If your workflow handles sensitive information, logs should avoid storing confidential data or should mask it appropriately.
Step 13 — Combine Logging with Alerts
Logging works best when combined with alerting systems. Logs provide detailed information, while alerts notify you when something goes wrong.
Step 14 — Scaling with Appilot
At this stage, logging works locally and provides clear visibility into workflow behavior. As workflows scale, managing logs across multiple systems becomes more complex.
This is where Appilot becomes useful because it helps centralize execution while your logging system continues to capture detailed insights for each workflow.
FAQ
Q1: What is automation error logging?
It is the process of recording errors and related information to help debug and analyze automation workflows.
Q2: Why is logging important?
Because it provides visibility into what happened during a workflow, making it easier to identify and fix issues.
Q3: What should I include in logs?
Timestamps, task names, input values, error messages, and relevant context.
Q4: Should I log everything?
No, focus on meaningful events and errors to avoid unnecessary noise.
Q5: Do I need Appilot for logging?
No, you can log locally. Appilot becomes useful when managing logs across multiple workflows.
Conclusion
Logging automation errors effectively is essential for building reliable systems. The key is not just capturing errors, but capturing the context that explains them. With structured logs, consistent formats, and meaningful details, debugging becomes faster and more efficient.
Start with simple logging for key events, then expand to include context and structured formats. Over time, your logs will become one of the most valuable tools for maintaining and improving your automation workflows.